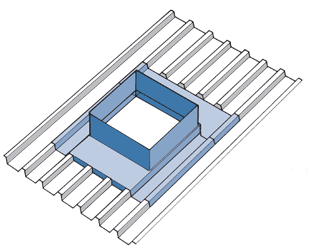
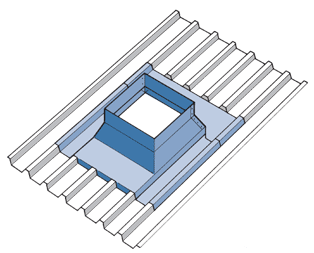
Type A Soaker
Soaker or under-flashing penetration designs are those that drain at the plane of the roof pan.
They are the preferred design and will produce a weathertight flashing in any circumstance where a hole is cut in metal roof cladding.
For new installations, the location of penetrations should be designed and the position known before the roof is installed.
For safety and simplicity the safety mesh, underlay and roof cladding should be laid to cover the openings, provided the sheets lengths covering the openings are increased by 150 mm or to the same measurement as the lap required to break the sheet at the head or back- curb of the penetration. See Non-Aligned Ribs Flashing.
All soaker flashings have an overlap to mate with the side overlap of the profile, which ensures that even in an overflow situation, water ingress is avoided.
It is highly unlikely that a penetration will be the exact width of the roof sheet, so the preferred method of weathering is to cut full cladding
sheets above the penetration and flash at the transverse lap.
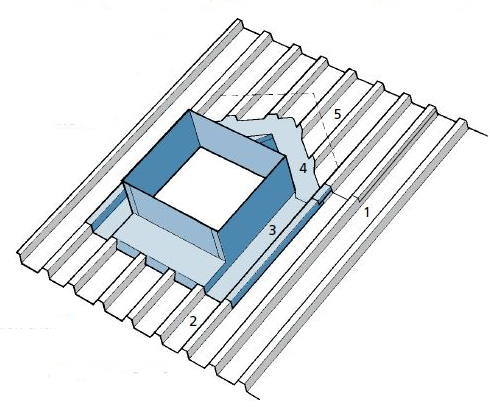
When penetrations line up with the ribs of the sheeting, the
module of the roof cladding determines the width of
the penetration.
Sheet 2 is cut to the bottom of the
penetration dimension.
Flashing 3 is the side-curb.
Flashing 4 is the back-curb.
Sheet 5 is cut to the top of the penetration
cricket + 75mm .
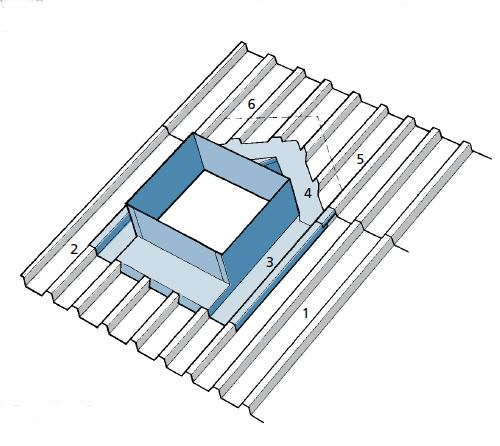
the penetration and 150mm minimum
above the cricket.
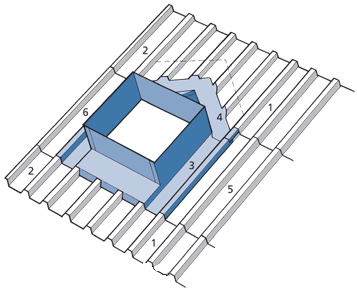
Flashing 3 is the side curb.
Flashing 4 is the back curb.
Sheet 5 & 6 are cut to the top of the
penetration hole and shaped to the
cricket.
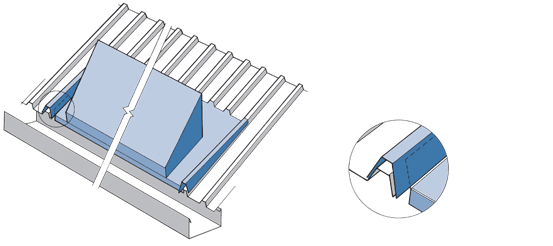
Where a wide penetration is bigger than 2 m, has a catchment area of more than 30 m² behind it, or where the pan capacity is insufficient, special draining provisions should be made.
This design may require the removal of the purlins adjacent to the penetration to allow a gutter to surround the penetration and discharge at the eave or internal gutter line. The gutter should be sized according to Capacity Calculations.
Penetration Gutter
Filler Sheets is the preferred detail for all penetration designs and has a separate side, back curb and apron flashing. The vertical corner intersection of the side and back curb can be 'double lapped' with the side curb under horizontally, and the vertical curb over. This technique makes a strong joint before fastening and sealing, and provides a double seal.
The module of the roof cladding determines the penetration flashing width Although it can be wider than the penetration hole required, the original dimension can be maintained by using a Splayed Skirt or by splaying the side curbs.
- Log in to post comments

